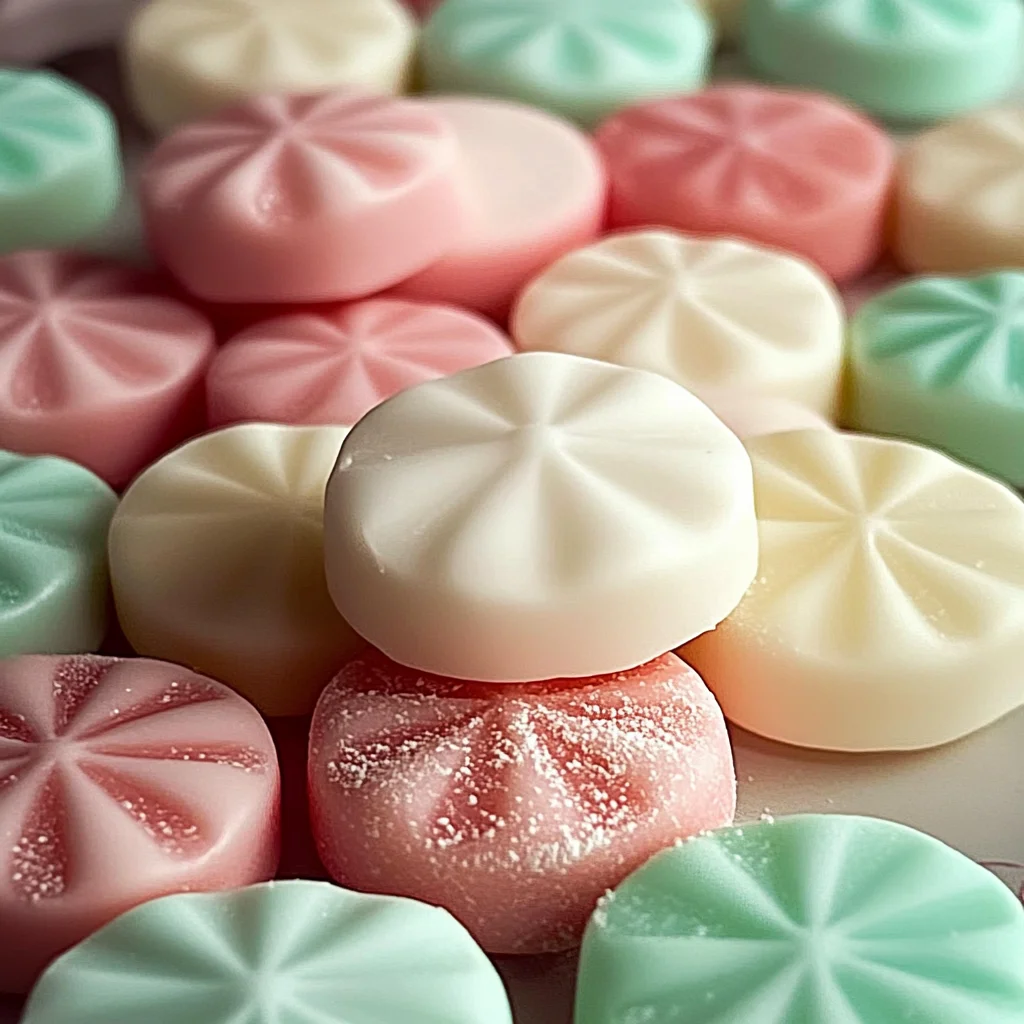
Sweet, creamy, and nostalgic—these Old-Fashioned Butter Mints are the perfect bite-sized treat for any celebration. Whether you’re looking for a quick holiday candy, easy party favor, or vintage dessert idea, these mints check all the boxes. With a melt-in-your-mouth texture and just a kiss of peppermint, they bring back fond memories of family gatherings and dessert tables. No baking required, minimal ingredients, and customizable colors—ideal for anyone looking for a quick dessert or easy recipe to impress.

Jump to:
- Why You’ll Love This Recipe
- Tools and Preparation
- Essential Tools and Equipment
- Importance of Each Tool
- Ingredients
- For the Butter Mints
- How to Make Old-Fashioned Butter Mints
- Step 1: Prepare the Butter Mixture
- Step 2: Incorporate Powdered Sugar
- Step 3: Color Your Dough (Optional)
- Step 4: Shape the Mints
- Step 5: Drying Process
- How to Serve Old-Fashioned Butter Mints
- As Party Favors
- With Coffee or Tea
- At Weddings
- During Holidays
- How to Perfect Old-Fashioned Butter Mints
- Best Side Dishes for Old-Fashioned Butter Mints
- Common Mistakes to Avoid
- Storage & Reheating Instructions
- Refrigerator Storage
- Freezing Old-Fashioned Butter Mints
- Reheating Old-Fashioned Butter Mints
- Frequently Asked Questions
- How do I make Old-Fashioned Butter Mints?
- Can I customize Old-Fashioned Butter Mints?
- How long do Old-Fashioned Butter Mints last?
- Are Old-Fashioned Butter Mints gluten-free?
- Final Thoughts
- 📖 Recipe Card
Why You’ll Love This Recipe
- Easy to Make: This recipe requires no baking and uses simple ingredients, making it accessible for all skill levels.
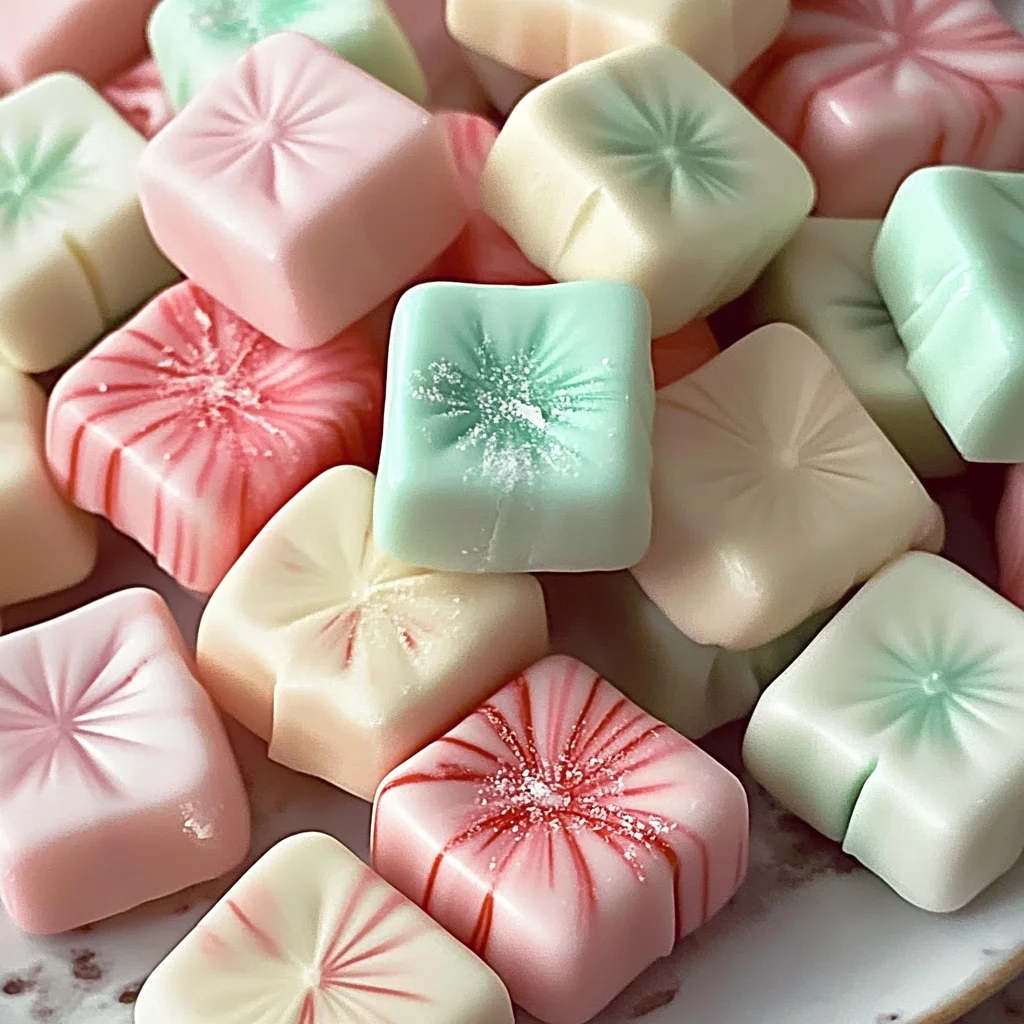
- Customizable Colors: Use gel food coloring to create vibrant shades that match your event theme or personal preference.
- Perfect for Every Occasion: Whether it’s a wedding, holiday gathering, or party favor, these mints are versatile enough for any event.
- Memorable Flavor: The subtle peppermint flavor provides a refreshing finish that complements a variety of desserts.
- Great for Gifting: Pack these mints in cute bags or jars for thoughtful edible gifts that friends and family will love.
Tools and Preparation
Before you start making your Old-Fashioned Butter Mints, gather the necessary tools. Having everything ready helps streamline the process and ensures success.
Essential Tools and Equipment
- Mixing bowl
- Electric mixer or whisk
- Rubber spatula
- Rolling pin
- Knife or scraper
- Parchment paper
Importance of Each Tool
- Mixing Bowl: A sturdy mixing bowl allows you to combine ingredients efficiently without spilling.
- Electric Mixer: Using an electric mixer makes blending the butter and sugar easier and achieves a smoother consistency.
- Knife or Scraper: These tools help you cut the dough into uniform pieces for consistent mint sizes.
Ingredients
For the Butter Mints
- 1/2 cup unsalted butter, softened
- 4 cups powdered sugar
- 1 tablespoon heavy cream or milk
- 1/2 teaspoon peppermint extract
- 1 pinch salt
- gel food coloring (optional)
How to Make Old-Fashioned Butter Mints
Step 1: Prepare the Butter Mixture
- Beat the softened butter in a large mixing bowl until smooth and creamy.
- Add the peppermint extract, salt, and heavy cream (or milk). Mix well until combined.
Step 2: Incorporate Powdered Sugar
- Gradually mix in the powdered sugar until a soft dough forms.
- Ensure there are no lumps by mixing thoroughly.
Step 3: Color Your Dough (Optional)
- If you want to add color, divide the dough into portions based on how many colors you plan to use.
- Knead gel food coloring into each portion until evenly colored.
Step 4: Shape the Mints
- Roll each portion of dough into thin ropes on a surface dusted with powdered sugar.
- Cut the ropes into bite-sized pieces using a knife or scraper.
Step 5: Drying Process
- Spread your mints onto parchment paper in a single layer.
- Allow them to dry at room temperature for 8 hours or overnight before serving.
Now you’re ready to enjoy these delightful Old-Fashioned Butter Mints! Perfect for sharing at any gathering or simply as a sweet treat for yourself!
How to Serve Old-Fashioned Butter Mints
Old-Fashioned Butter Mints are versatile treats that can elevate any occasion. Their nostalgic flavor and delightful texture make them perfect for various settings, from casual gatherings to formal events.
As Party Favors
- Individual Wrapping: Wrap each mint in colorful foil for a festive touch that guests can take home.
- Decorative Jars: Fill small jars with mints and tie them with a ribbon for an elegant party favor.
With Coffee or Tea
- Minty Delight: Serve these mints alongside a warm cup of coffee or tea to complement the flavors and provide a sweet treat after meals.
- Refreshing Addition: The peppermint flavor pairs nicely with herbal teas, adding a refreshing element.
At Weddings
- Sweet Table Addition: Include Old-Fashioned Butter Mints on a dessert table at weddings for guests to enjoy.
- Color Coordination: Customize the mints’ colors to match the wedding theme for an extra special touch.
During Holidays
- Festive Displays: Use these mints as part of your holiday decor by placing them in decorative bowls around your home.
- Gift Bags: Add a handful of mints to holiday gift bags for a sweet surprise.
How to Perfect Old-Fashioned Butter Mints
Perfecting Old-Fashioned Butter Mints is all about technique and attention to detail. Follow these tips to ensure your mints turn out perfectly every time.
- Bold Butter Quality: Use high-quality unsalted butter for the best flavor and texture.
- Bold Mixing Technique: Beat the butter well until creamy, as this helps incorporate air for a lighter texture.
- Bold Sugar Gradually: Add powdered sugar slowly to avoid clumps and ensure a smooth dough consistency.
- Bold Cream Consistency: Adjust the amount of cream or milk based on humidity; add more if the dough feels too dry.
- Bold Drying Time: Allow ample time for drying; overnight is ideal to achieve the perfect firmness without stickiness.
Best Side Dishes for Old-Fashioned Butter Mints
Old-Fashioned Butter Mints pair beautifully with a variety of dishes, making them a delightful addition to any meal. Here are some side dish ideas that complement their sweetness.
- Bold Fruit Salad: A fresh mix of seasonal fruits provides a refreshing contrast to the sweetness of the mints.
- Bold Cheese Platter: A selection of cheeses can balance out the sugary treat, offering savory flavors alongside the sweets.
- Bold Mixed Nuts: Spiced or plain nuts add crunch and saltiness, enhancing the overall tasting experience.
- Bold Vegetable Crudités: Crisp vegetables served with hummus or dip create a crunchy, healthy counterpoint to the soft mints.
- Bold Chocolate Fondue: Melted chocolate served with fruit and marshmallows invites dipping fun and indulgence alongside your mints.
- Bold Mini Sandwiches: Finger sandwiches provide savory bites that contrast nicely with sweet butter mints during gatherings.
Common Mistakes to Avoid
Making Old-Fashioned Butter Mints can be simple, but there are common pitfalls that can affect your results. Here are some mistakes to watch out for:
- Skipping the butter softening step: Using cold butter will make it difficult to achieve a smooth and creamy texture. Always allow your butter to soften at room temperature before mixing.
- Not measuring powdered sugar correctly: Too much or too little powdered sugar can change the consistency of your dough. Use a kitchen scale or spoon the sugar into a measuring cup without packing it.
- Over-kneading the dough: Kneading too much can cause the mints to become tough instead of tender. Mix just until combined, then stop.
- Ignoring drying time: Allowing the mints to dry is essential for proper texture. Don’t rush this step; let them sit at room temperature for at least 8 hours or overnight.
- Using too much coloring: Adding excessive gel food coloring can alter the flavor and texture of your mints. Start with a small amount and adjust as needed.
Storage & Reheating Instructions
Refrigerator Storage
- Store mints in an airtight container.
- They will last up to 2 weeks in the refrigerator.
- Layer parchment paper between mints to prevent sticking.
Freezing Old-Fashioned Butter Mints
- Freeze mints in an airtight container or freezer bag.
- They can be stored for up to 3 months.
- Thaw in the refrigerator before serving for best taste.
Reheating Old-Fashioned Butter Mints
- Oven: Preheat to 200°F (93°C) and warm mints for about 5 minutes, just enough to soften slightly.
- Microwave: Place mints on a microwave-safe plate and heat in 10-second intervals until slightly softened.
- Stovetop: Place mints in a covered pot over low heat for a few minutes, checking frequently to avoid melting.
Frequently Asked Questions
Here are some common questions about making Old-Fashioned Butter Mints:
How do I make Old-Fashioned Butter Mints?
To make these mints, beat softened butter until smooth, mix in peppermint extract and cream, then gradually add powdered sugar until a soft dough forms. Shape and dry as instructed.
Can I customize Old-Fashioned Butter Mints?
Absolutely! You can use different colors of gel food coloring or even mix flavors like vanilla or chocolate for variety.
How long do Old-Fashioned Butter Mints last?
When stored properly, these mints can last up to 2 weeks in the refrigerator or up to 3 months in the freezer.
Are Old-Fashioned Butter Mints gluten-free?
Yes, this recipe is naturally gluten-free since it does not contain any wheat-based ingredients.
Final Thoughts
Old-Fashioned Butter Mints are not only sweet and nostalgic but also incredibly versatile. Their simple preparation makes them perfect for any occasion, from holiday gatherings to casual parties. Feel free to customize colors and flavors to suit your preferences. Try making them today and delight your friends and family with this classic treat!
Did You Enjoy Making This Recipe? Please rate this recipe with ⭐⭐⭐⭐⭐ or leave a comment.
📖 Recipe Card
Print
Old-Fashioned Butter Mints
- Total Time: 0 hours
- Yield: Approximately 30 mints 1x
Description
Indulge in the sweet nostalgia of Old-Fashioned Butter Mints, a delightful treat that melts in your mouth. Perfect for any celebration, these no-bake mints are incredibly easy to make and require minimal ingredients. With their creamy texture and subtle peppermint flavor, they evoke warm memories of family gatherings and festive occasions. Whether you’re looking for a charming party favor or a unique edible gift, these colorful butter mints are sure to impress. Customize them with vibrant gel food coloring to match your event theme, making them as beautiful as they are delicious.
Ingredients
- 1/2 cup unsalted butter, softened
- 4 cups powdered sugar
- 1 tablespoon heavy cream or milk
- 1/2 teaspoon peppermint extract
- 1 pinch salt
- Gel food coloring (optional)
Instructions
- In a mixing bowl, beat the softened butter until smooth and creamy.
- Mix in the peppermint extract, salt, and heavy cream (or milk) until well combined.
- Gradually add the powdered sugar until a soft dough forms.
- If desired, divide the dough and knead in gel food coloring for vibrant variations.
- Roll the dough into thin ropes on a surface dusted with powdered sugar and cut into bite-sized pieces.
- Place mints on parchment paper in a single layer and allow to dry at room temperature for 8 hours or overnight.
- Prep Time: 20 minutes
- Cook Time: None
- Category: Dessert
- Method: No-Bake
- Cuisine: American
Nutrition
- Serving Size: 1 mint (7g)
- Calories: 28
- Sugar: 6g
- Sodium: 4mg
- Fat: 1g
- Saturated Fat: 0.5g
- Unsaturated Fat: 0.5g
- Trans Fat: 0g
- Carbohydrates: 7g
- Fiber: 0g
- Protein: 0g
- Cholesterol: 5mg