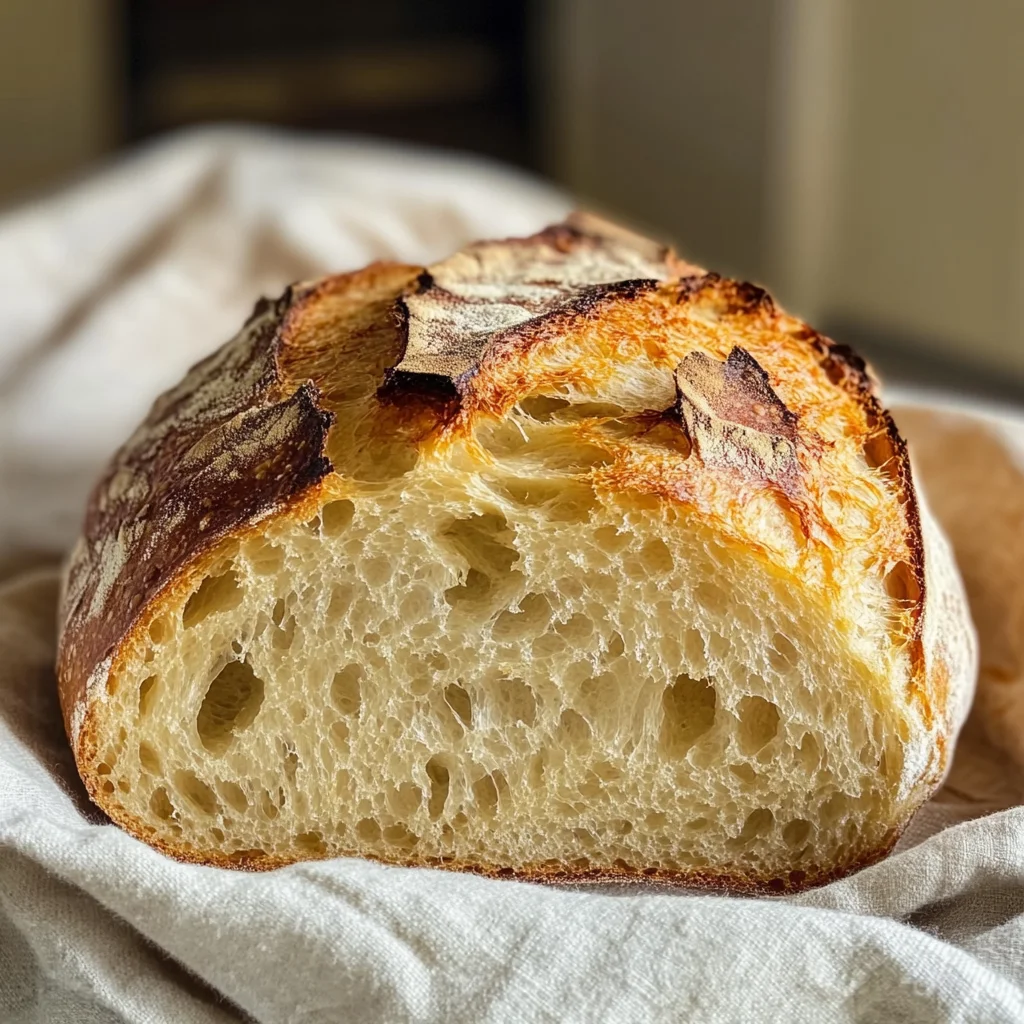
This Artisan Bread Recipe is a delightful way to create homemade bread with minimal effort. Perfect for any occasion, from cozy family dinners to casual get-togethers, this no-knead bread offers an irresistible crust and a soft, tender crumb. You’ll love how simple it is to prepare, making it accessible for beginners and seasoned bakers alike.
Jump to:
- Why You’ll Love This Recipe
- Tools and Preparation
- Essential Tools and Equipment
- Importance of Each Tool
- Ingredients
- For the Bread
- How to Make Artisan Bread Recipe
- Step 1: Combine Dry Ingredients
- Step 2: Add Water
- Step 3: Let It Rise
- Step 4: Shape the Dough
- Step 5: Prepare for Baking
- Step 6: Preheat Your Oven
- Step 7: Bake Your Bread
- Step 8: Cool Before Slicing
- How to Serve Artisan Bread Recipe
- With Olive Oil and Balsamic Vinegar
- As a Sandwich Base
- With Soups and Stews
- For Bruschetta
- With Cheese and Charcuterie
- How to Perfect Artisan Bread Recipe
- Best Side Dishes for Artisan Bread Recipe
- Common Mistakes to Avoid
- Storage & Reheating Instructions
- Refrigerator Storage
- Freezing Artisan Bread Recipe
- Reheating Artisan Bread Recipe
- Frequently Asked Questions
- Can I use whole wheat flour instead of all-purpose flour?
- What is an artisan bread recipe?
- How long does it take for the dough to rise?
- Is it necessary to score the bread before baking?
- Can I add ingredients like herbs or cheese?
- Final Thoughts
- 📖 Recipe Card
Why You’ll Love This Recipe
- Minimal Effort: With just three ingredients and no kneading required, you’ll spend less time in the kitchen and more time enjoying your bread.
- Delicious Flavor: The long rise time enhances the flavor, giving you a loaf that tastes like it’s been crafted by a professional baker.
- Versatile Uses: This artisan bread pairs well with soups, salads, or as a base for sandwiches—perfect for any meal!
- Perfectly Crusty: By adding steam during baking, you achieve a beautifully crusty exterior that makes every slice delightful.
- Beginner-Friendly: No special skills are needed; this recipe is designed for anyone looking to bake their first loaf of bread.
Tools and Preparation
To create this artisan bread, you’ll need some essential tools. Gathering these items ahead of time will help streamline your baking process.
Essential Tools and Equipment
- Large mixing bowl
- Measuring cups and spoons
- Parchment paper
- Bread knife
- Oven-safe Dutch oven or baking stone
Importance of Each Tool
- Mixing Bowl: A large bowl allows ample space for combining ingredients and helps the dough rise effectively.
- Parchment Paper: This prevents the dough from sticking and makes transferring it easier.
- Oven-Safe Dutch Oven: Provides an ideal environment for baking by retaining heat and moisture, ensuring a crusty loaf.
Ingredients
This no-knead artisan bread is the easiest bread recipe you’ll ever make! With just three simple ingredients and minimal effort, it yields a crusty, flavorful loaf with a tender crumb—perfect for beginners.
For the Bread
- 3 cups (395 grams) all-purpose flour or bread flour
- ½ tablespoon kosher salt
- ¼ ounce instant or active dry yeast packet (or 2 ¼ teaspoons)
- 1 ½ cups warm water (105°F)
How to Make Artisan Bread Recipe
Step 1: Combine Dry Ingredients
- In a large bowl, combine flour, salt, and yeast. Stir well to evenly mix the dry ingredients.
Step 2: Add Water
- Pour warm water over the dry mixture.
- Mix until combined—the dough should be sticky but manageable.
Step 3: Let It Rise
- Cover the bowl with a towel or plastic wrap.
- Allow it to rise at room temperature for 2 to 10 hours or overnight for enhanced flavor.
Step 4: Shape the Dough
- Wet your hands to prevent sticking.
- Turn the dough onto a lightly floured surface.
- Gently fold the edges into the center to form a round loaf or divide into two loaves.
Step 5: Prepare for Baking
- Place the shaped dough on parchment paper.
- Dust the top with flour and score 1 to 4 lines with a bread knife.
- Let it rest for 20 to 30 minutes.
Step 6: Preheat Your Oven
- Preheat oven to 450°F while placing your baking stone or Dutch oven inside.
Step 7: Bake Your Bread
- Slide the dough with parchment onto the hot surface in your oven.
- Quickly add 1 cup of hot water or five ice cubes to create steam.
- Bake for about 25 to 30 minutes until golden brown and crusty.
Step 8: Cool Before Slicing
- Remove from oven and cool on a rack for at least 30 minutes before slicing.
- Store any leftover bread in a paper bag to maintain its crispness.
Enjoy your homemade artisan bread as part of any meal!
How to Serve Artisan Bread Recipe
Artisan bread is versatile and can be enjoyed in many ways. Whether you want a simple snack or a hearty meal, this crusty bread complements various dishes beautifully.
With Olive Oil and Balsamic Vinegar
- Drizzle high-quality olive oil and a splash of balsamic vinegar on a plate for a simple yet elegant dipping option.
As a Sandwich Base
- Slice the artisan bread to create flavorful sandwiches with your choice of fillings—think turkey, roasted vegetables, or cheese.
With Soups and Stews
- Serve warm slices alongside your favorite soups or stews to soak up all the delicious flavors.
For Bruschetta
- Toast slices of artisan bread and top with fresh diced tomatoes, basil, and garlic for a refreshing appetizer.
With Cheese and Charcuterie
- Pair slices with an assortment of cheeses and cured meats (like turkey) for an impressive charcuterie board.
How to Perfect Artisan Bread Recipe
To ensure your artisan bread turns out perfectly every time, follow these handy tips.
- Use warm water – Aim for water around 105°F to activate the yeast effectively.
- Let it rise longer – For the best flavor, let the dough rise overnight if possible.
- Avoid over-handling – Keep the dough sticky; this will help achieve that desirable crumb structure.
- Preheat your oven properly – Make sure your baking surface is hot before placing the dough inside for optimal crust formation.
- Create steam – Add hot water or ice cubes in the oven to create steam, resulting in a crustier loaf.
Best Side Dishes for Artisan Bread Recipe
Artisan bread pairs wonderfully with many side dishes that enhance its flavors. Here are some great options to consider:
- Creamy Tomato Soup – This classic combination provides warmth and comfort; perfect for dipping your artisan bread.
- Garlic Butter Shrimp – Juicy shrimp cooked in garlic butter make for an indulgent pairing with crusty bread.
- Roasted Vegetable Medley – A colorful mix of seasonal vegetables roasted until tender pairs nicely with the texture of artisan bread.
- Spinach Salad – Fresh spinach topped with nuts, berries, and vinaigrette offers a refreshing contrast to the bread’s richness.
- Chickpea Salad – A hearty salad made with chickpeas, veggies, and herbs adds protein and flavor when served alongside artisan bread.
- Stuffed Bell Peppers – These can be filled with grains and spices; serve them warm next to slices of artisan bread for a filling meal.
Common Mistakes to Avoid
Making artisan bread can be simple, but a few common mistakes can hinder your success. Here are some pitfalls to watch out for:
- Ignoring the dough’s texture – If your dough isn’t sticky enough, it won’t rise as well. Aim for a moist, slightly tacky consistency when mixing ingredients.
- Not allowing sufficient rise time – Bread needs time to develop flavor and texture. Don’t rush the rising process; letting it sit overnight yields the best results.
- Using incorrect oven temperature – Baking at a too low temperature can result in a pale loaf. Ensure your oven reaches 450°F before placing the dough inside for a crusty exterior.
- Skipping the steam – Adding steam to your oven creates a better crust. Use hot water or ice cubes in the oven to achieve that coveted crunchy crust.
- Cutting the bread too soon – Allow your bread to cool for at least 30 minutes before slicing. This rest period helps improve texture and flavor.
Storage & Reheating Instructions
Refrigerator Storage
- Store in a paper bag or loosely wrapped with plastic wrap.
- Bread can last up to a week in the refrigerator, but it’s best enjoyed fresh.
Freezing Artisan Bread Recipe
- Wrap tightly in aluminum foil or freezer-safe plastic wrap.
- Artisan bread can be frozen for up to three months without losing quality.
Reheating Artisan Bread Recipe
- Oven – Preheat your oven to 350°F and warm the bread for about 10-15 minutes for optimal freshness.
- Microwave – Place on a microwave-safe plate and heat in short intervals (10-15 seconds) until warm; this may soften the crust.
- Stovetop – Heat slices in a skillet over medium-low heat for about 1-2 minutes on each side for a crispy finish.
Frequently Asked Questions
Here are some commonly asked questions regarding this Artisan Bread Recipe:
Can I use whole wheat flour instead of all-purpose flour?
Yes, you can substitute whole wheat flour, but you may need to adjust the liquid slightly since whole wheat absorbs more moisture.
What is an artisan bread recipe?
An artisan bread recipe focuses on traditional methods, emphasizing natural fermentation and high-quality ingredients, resulting in flavorful loaves with great texture.
How long does it take for the dough to rise?
Depending on room temperature, it can take anywhere from 2 hours up to overnight. Longer rises enhance flavor.
Is it necessary to score the bread before baking?
Yes, scoring allows steam to escape during baking and helps control where the loaf expands, resulting in beautiful shapes and textures.
Can I add ingredients like herbs or cheese?
Absolutely! Customize your artisan bread by adding herbs, spices, or cheese while mixing the dry ingredients for added flavor.
Final Thoughts
This no-knead artisan bread recipe is incredibly easy and perfect for beginners. Its simplicity makes it versatile—ideal for sandwiches or simply enjoyed fresh with butter. Feel free to experiment with flavors by adding herbs or spices of your choice!
Did You Enjoy Making This Recipe? Please rate this recipe with ⭐⭐⭐⭐⭐ or leave a comment.
📖 Recipe Card
Print
Artisan Bread Recipe
- Total Time: 40 minutes
- Yield: Approximately 12 slices 1x
Description
This Artisan Bread Recipe is the perfect solution for anyone craving fresh, homemade bread without the fuss. With just three simple ingredients, you can create a crusty loaf that boasts a soft and tender crumb—ideal for any occasion. Whether you’re serving it alongside a hearty soup, crafting gourmet sandwiches, or simply enjoying it with a drizzle of olive oil, this no-knead recipe is both versatile and beginner-friendly. Allow the dough to rise slowly for maximum flavor, and watch as it transforms into a beautiful golden loaf in your oven. Enjoy the satisfaction of baking from scratch with minimal effort!
Ingredients
- 3 cups all-purpose flour or bread flour
- ½ tablespoon kosher salt
- ¼ ounce instant or active dry yeast (or 2 ¼ teaspoons)
- 1 ½ cups warm water (105°F)
Instructions
- In a large bowl, combine flour, salt, and yeast; stir until mixed.
- Pour warm water over the dry ingredients; mix until just combined to form a sticky dough.
- Cover the bowl with a towel and let it rise at room temperature for 2 to 10 hours, preferably overnight.
- Once risen, wet your hands and turn the dough onto a floured surface; shape into one round loaf or divide into two.
- Place on parchment paper, dust with flour, and score the top with a knife; let rest for about 30 minutes.
- Preheat your oven to 450°F while placing your Dutch oven or baking stone inside.
- Transfer the dough with parchment into the hot Dutch oven; add steam by placing hot water or ice cubes in the oven.
- Bake for 25-30 minutes until golden brown and crusty; cool on a rack before slicing.
- Prep Time: 10 minutes
- Cook Time: 30 minutes
- Category: Bread
- Method: Baking
- Cuisine: American
Nutrition
- Serving Size: 1 slice
- Calories: 130
- Sugar: 0g
- Sodium: 120mg
- Fat: 0.5g
- Saturated Fat: 0g
- Unsaturated Fat: 0g
- Trans Fat: 0g
- Carbohydrates: 26g
- Fiber: 1g
- Protein: 4g
- Cholesterol: 0mg