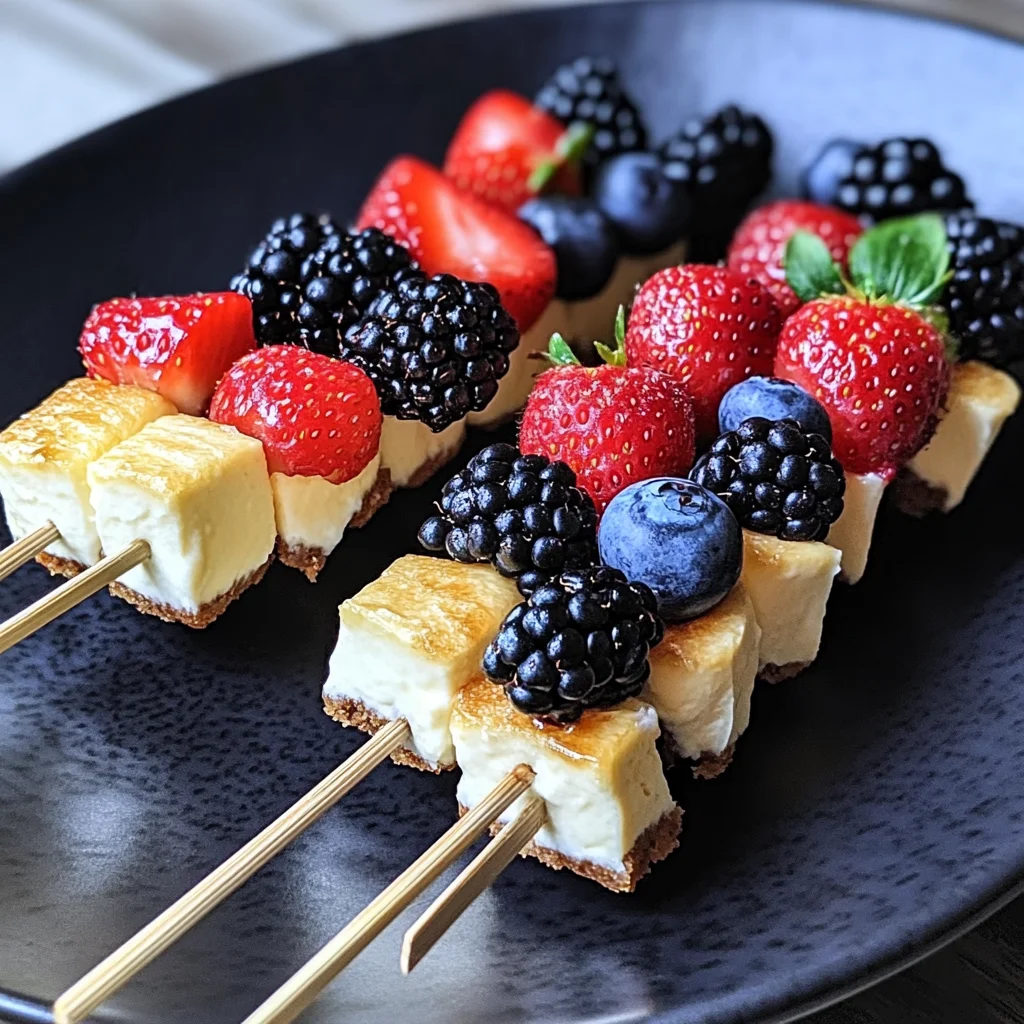
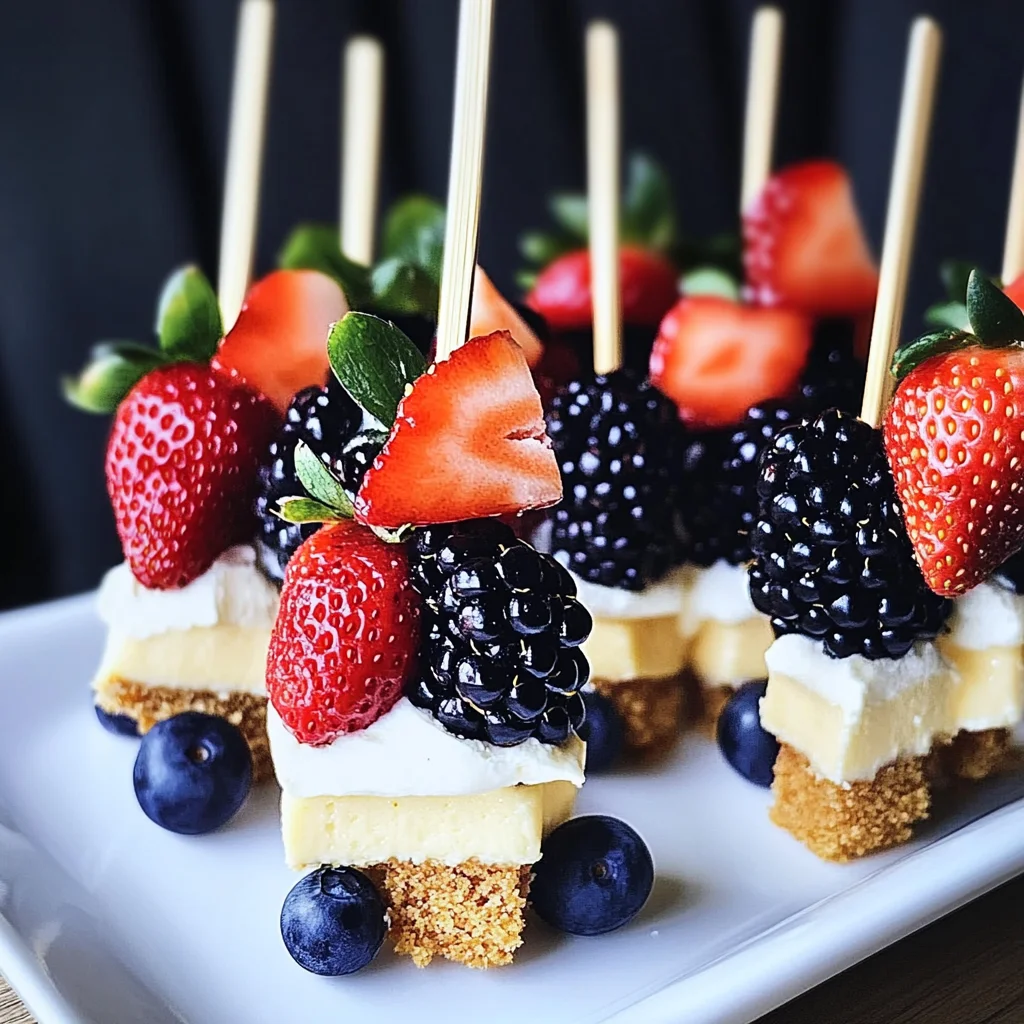
Berry Cheesecake Dessert Kabobs are a delightful fusion of creamy cheesecake and fresh berries, making them the perfect handheld treat for any occasion. These colorful, bite-sized desserts are not only visually appealing but also incredibly easy to prepare. Whether you’re hosting a summer barbecue, planning a picnic, or simply indulging at home, these kabobs offer a refreshing twist on traditional desserts.
Jump to:
- Why You’ll Love This Recipe
- Tools and Preparation
- Essential Tools and Equipment
- Importance of Each Tool
- Ingredients
- For the Cheesecake Base
- For the Fresh Fruits
- How to Make Berry Cheesecake Dessert Kabobs
- Step 1: Prepare the Cheesecake
- Step 2: Assemble the Kabobs
- Step 3: Serve or Refrigerate
- How to Serve Berry Cheesecake Dessert Kabobs
- On a Decorative Platter
- With Dips
- At a BBQ or Picnic
- As Individual Treats
- In Mini Jars
- How to Perfect Berry Cheesecake Dessert Kabobs
- Best Side Dishes for Berry Cheesecake Dessert Kabobs
- Common Mistakes to Avoid
- Storage & Reheating Instructions
- Refrigerator Storage
- Freezing Berry Cheesecake Dessert Kabobs
- Reheating Berry Cheesecake Dessert Kabobs
- Frequently Asked Questions
- Can I use different fruits in my Berry Cheesecake Dessert Kabobs?
- How long do Berry Cheesecake Dessert Kabobs last?
- What dips pair well with Berry Cheesecake Dessert Kabobs?
- Can I prepare these kabobs ahead of time?
- Final Thoughts
- 📖 Recipe Card
Why You’ll Love This Recipe
- Easy to Make: With just a few simple steps, you can whip up these delicious kabobs in no time.
- Fresh and Flavorful: The combination of ripe berries and creamy cheesecake creates an irresistible flavor experience.
- Versatile Serving Options: Perfect for parties, picnics, or as an everyday treat—this recipe fits all occasions.
- Customizable: Feel free to mix in your favorite fruits or add dips like chocolate or caramel for extra indulgence.
- Healthy Indulgence: With the inclusion of fresh fruits, these kabobs provide vitamins and a lighter dessert option.
Tools and Preparation
Before you start making these delightful kabobs, gather your essential tools. Having everything ready will make the process smooth and enjoyable.
Essential Tools and Equipment
- Skewers
- Cutting board
- Knife
- Mixing bowl
Importance of Each Tool
- Skewers: Essential for threading your ingredients together, creating that fun kabob shape.
- Cutting board: Provides a safe surface to chop the cheesecake and fruits efficiently.
- Knife: A sharp knife is crucial for cleanly slicing the cheesecake into perfect pieces.
- Mixing bowl: Useful if you decide to prepare any dips or additional toppings.
Ingredients
For the Cheesecake Base
- 16 oz New York Style Cheesecake (6 round, refrigerated)
For the Fresh Fruits
- Fresh strawberries (washed, tops removed)
- Fresh blueberries (washed)
- Fresh blackberries (washed)
How to Make Berry Cheesecake Dessert Kabobs
Step 1: Prepare the Cheesecake
- Slice the cheesecake into strips.
- Cut those strips into triangles for easy threading on skewers.
Step 2: Assemble the Kabobs
- Start by threading blueberries onto skewers followed by cheesecake pieces.
- Alternate adding strawberries and blackberries, interspersed with more cheesecake, until each skewer is filled.
Step 3: Serve or Refrigerate
- Serve immediately for fresh enjoyment.
- If not serving right away, refrigerate until ready to enjoy these tasty treats.
These Berry Cheesecake Dessert Kabobs are sure to impress your guests and satisfy your sweet tooth!
How to Serve Berry Cheesecake Dessert Kabobs
Berry Cheesecake Dessert Kabobs are versatile and can be served in many delightful ways. Whether for a casual family gathering or a fancy event, these kabobs will impress your guests.
On a Decorative Platter
- Arrange the kabobs on a colorful platter to create an eye-catching centerpiece. Add edible flowers for a touch of elegance.
With Dips
- Serve with chocolate or caramel dips on the side. This adds an indulgent twist that complements the sweetness of the berries.
At a BBQ or Picnic
- These kabobs are perfect for outdoor events. They are easy to eat and don’t require any utensils, making them ideal for summer gatherings.
As Individual Treats
- Wrap each kabob in parchment paper tied with twine. This makes for charming individual servings that guests can easily grab.
In Mini Jars
- Place cut kabob pieces in small jars with lids. These jars make great portable desserts and add a fun, rustic appeal.
How to Perfect Berry Cheesecake Dessert Kabobs
Making Berry Cheesecake Dessert Kabobs is simple, but a few tips can elevate your dish to perfection.
- Use ripe berries: Selecting fresh, ripe berries enhances flavor and ensures that your kabobs are bursting with sweetness.
- Chill before serving: Refrigerating the assembled kabobs for at least 30 minutes helps them set and makes them refreshing to eat.
- Experiment with fruits: Feel free to mix in other fruits like bananas or pineapple for added variety and flavor.
- Skewer technique: Alternate threading the cheesecake and fruit carefully for an appealing presentation while maintaining balance on the skewer.
- Presentation matters: Use vibrant plates or platters to serve, as they can make your kabobs look even more enticing.
Best Side Dishes for Berry Cheesecake Dessert Kabobs
Pairing side dishes with Berry Cheesecake Dessert Kabobs can enhance your dessert experience. Here are some great options:
- Fresh Fruit Salad: A mix of seasonal fruits can balance out the sweetness of the kabobs while providing additional textures.
- Mini Spinach Salad: Lightly dressed spinach salad adds freshness and pairs well with the richness of cheesecake.
- Cheese Platter: Include various cheeses like brie or goat cheese. The creaminess complements the dessert beautifully.
- Chocolate-Covered Pretzels: The salty crunch offers contrast to the sweet kabobs, creating a delightful flavor combination.
- Nut Mix: A selection of roasted nuts provides a crunchy texture that contrasts nicely with soft cheesecake.
- Lemon Sorbet: A light sorbet serves as a refreshing palate cleanser between bites of rich cheesecake.
- Vanilla Yogurt Dip: A creamy yogurt dip adds another layer of flavor while keeping it healthy.
- Grilled Peaches: Warm grilled peaches bring out natural sweetness and provide a unique twist alongside the kabobs.
Common Mistakes to Avoid
When making Berry Cheesecake Dessert Kabobs, a few common mistakes can affect the final product. Here are some tips to help you avoid them.
- Boldly choosing unripe berries: Using unripe or overly soft berries can result in a less flavorful kabob. Always select ripe, firm berries for the best taste and texture.
- Skipping the refrigeration: Not chilling your cheesecake before cutting can lead to a messy assembly. Ensure your cheesecake is well-chilled for easier slicing and handling.
- Overloading the skewers: Stuffing too many ingredients onto one skewer can make it hard to eat. Aim for a balanced mix of berries and cheesecake pieces for easy enjoyment.
- Ignoring presentation: Aesthetics matter! Avoid dull arrangements by alternating colors and shapes for an eye-catching display. Make your kabobs visually appealing.
- Using the wrong dipping options: Pairing with unsuitable dips may overwhelm the flavors. Opt for lighter dips like yogurt or fruit purees to complement the dessert.
Storage & Reheating Instructions
Refrigerator Storage
- Store leftover kabobs in an airtight container.
- They will last up to 2 days in the refrigerator.
Freezing Berry Cheesecake Dessert Kabobs
- Wrap each kabob individually in plastic wrap before placing them in a freezer bag.
- They can be frozen for up to 1 month.
Reheating Berry Cheesecake Dessert Kabobs
- Oven: Preheat to 350°F (175°C) and warm kabobs on a baking sheet for about 5–10 minutes.
- Microwave: Heat on medium power for 20-30 seconds until just warm; avoid overheating.
- Stovetop: Place kabobs in a non-stick skillet over low heat, turning frequently, until warmed through.
Frequently Asked Questions
Here are some common questions about making Berry Cheesecake Dessert Kabobs.
Can I use different fruits in my Berry Cheesecake Dessert Kabobs?
Yes! Feel free to mix in fruits like bananas or pineapple for added variety and flavor.
How long do Berry Cheesecake Dessert Kabobs last?
When stored properly, they can last up to 2 days in the refrigerator and up to 1 month if frozen.
What dips pair well with Berry Cheesecake Dessert Kabobs?
Consider lighter options like yogurt or fruit purees that won’t overpower the flavors of the cheesecake and berries.
Can I prepare these kabobs ahead of time?
Absolutely! You can assemble them a few hours in advance and keep them refrigerated until serving.
Final Thoughts
Berry Cheesecake Dessert Kabobs are not only delicious but also versatile. You can customize them with different fruits or dips based on your preferences. Try making these delightful treats for your next gathering; they are sure to impress!
Did You Enjoy Making This Recipe? Please rate this recipe with ⭐⭐⭐⭐⭐ or leave a comment.
📖 Recipe Card
Print
Berry Cheesecake Dessert Kabobs
- Total Time: 15 minutes
- Yield: Approximately 8 kabobs 1x
Description
Berry Cheesecake Dessert Kabobs are a delightful treat that perfectly combines creamy cheesecake with fresh, juicy berries. Ideal for any occasion—be it a summer barbecue, a picnic in the park, or simply a sweet indulgence at home—these kabobs are not only visually appealing but incredibly easy to prepare. Each colorful skewer is packed with flavor and offers a refreshing twist on traditional desserts. With their bite-sized portions, they make for perfect handheld snacks that everyone will love!
Ingredients
- 16 oz New York Style Cheesecake (6" round, refrigerated)
- Fresh strawberries (washed, tops removed)
- Fresh blueberries (washed)
- Fresh blackberries (washed)
Instructions
- Slice the chilled cheesecake into strips, then cut each strip into triangles for easy assembly.
- On skewers, thread blueberries first followed by pieces of cheesecake. Alternate with strawberries and blackberries until the skewer is filled.
- Serve immediately or refrigerate until ready to enjoy.
- Prep Time: 15 minutes
- Cook Time: 0 minutes
- Category: Dessert
- Method: No-bake
- Cuisine: American
Nutrition
- Serving Size: 1 kabob (50g)
- Calories: 120
- Sugar: 8g
- Sodium: 90mg
- Fat: 4g
- Saturated Fat: 2g
- Unsaturated Fat: 2g
- Trans Fat: 0g
- Carbohydrates: 18g
- Fiber: 1g
- Protein: 3g
- Cholesterol: 10mg